As Greg did on Monday, today I’ll account for all of my costs in the 40K to Far Away challenge. Many readers have been curious about how we booked our travels and stayed within the parameters of the competition. Spoiler alert: while I only used 40,000 points for my trip, I share a common characteristic with the majority of Americans (according to many surveys I’ve read): I overspent. I intended to stay under budget, but a few mistakes both before and during the trip totally busted my budget. I’m at least as disappointed in that as anyone reading this, but I hope that this post will shine a light on my mistakes so you don’t make them. Here’s a look at how I used my points and money — and the explanation as to what I intended to be different and how I messed up.

Long distance travel spend: 39,500 points and $436.97
Here’s how I spent my points and cash for long-distance travel:
- Turkish Award: 7,500 points + $5.60
- DC to Chicago to Honolulu on United
- Virgin Atlantic Award: 20,000 points + $5.60 with a 30% transfer bonus. Net cost: 16,000 points + $5.60
- Honolulu to Tokyo (NRT) on Delta
- Air Asia cash ticket: $272*
- Tokyo NRT -> Bangkok (DMK) (9hr 40min layover) -> Brisbane, Australia (BNE)
- *Note that this was the total price. See below for how I planned (but failed) to reduce the net cost.
- Note also that I intended to enter Bangkok but was unable to do so
- LifeMiles award: 21,000 miles + $138 with a 25% transfer bonus + 1000 purchased miles. Net cost: 16,000 miles + $153.77
- Brisbane to Christchurch on Air New Zealand (overnight layover of 9hrs)
- Christchurch to Nelson, NZ on Air New Zealand (daytime layover of 8hrs)
- Nelson, NZ to Auckland, NZ on Air New Zealand (overnight layover of 13.5hrs)
- Auckland, NZ to Niue on Air New Zealand
- Booked as one ticket via manual booking process

How I intended this to be under budget:
When we set out the rules for the challenge, we agreed that we would not use our $400 to engage in manufactured spending for the purpose of generating, for example, a hundred thousand miles. That would clearly defy the spirit of this particular challenge (getting far on 40K points). However, we agreed that we could use existing credit card perks (like Priority Pass or Hilton Gold status) or elite status perks.
I interpreted this to mean that Amex Offers were fair game as they are a perk of having American Express credit cards. Over the summer, an Amex Offer came out for select technology providers that was good for Newegg.com. We reported it here. The exciting thing at the time, which I alluded to within the post, is that Newegg sold Visa Gift Cards.
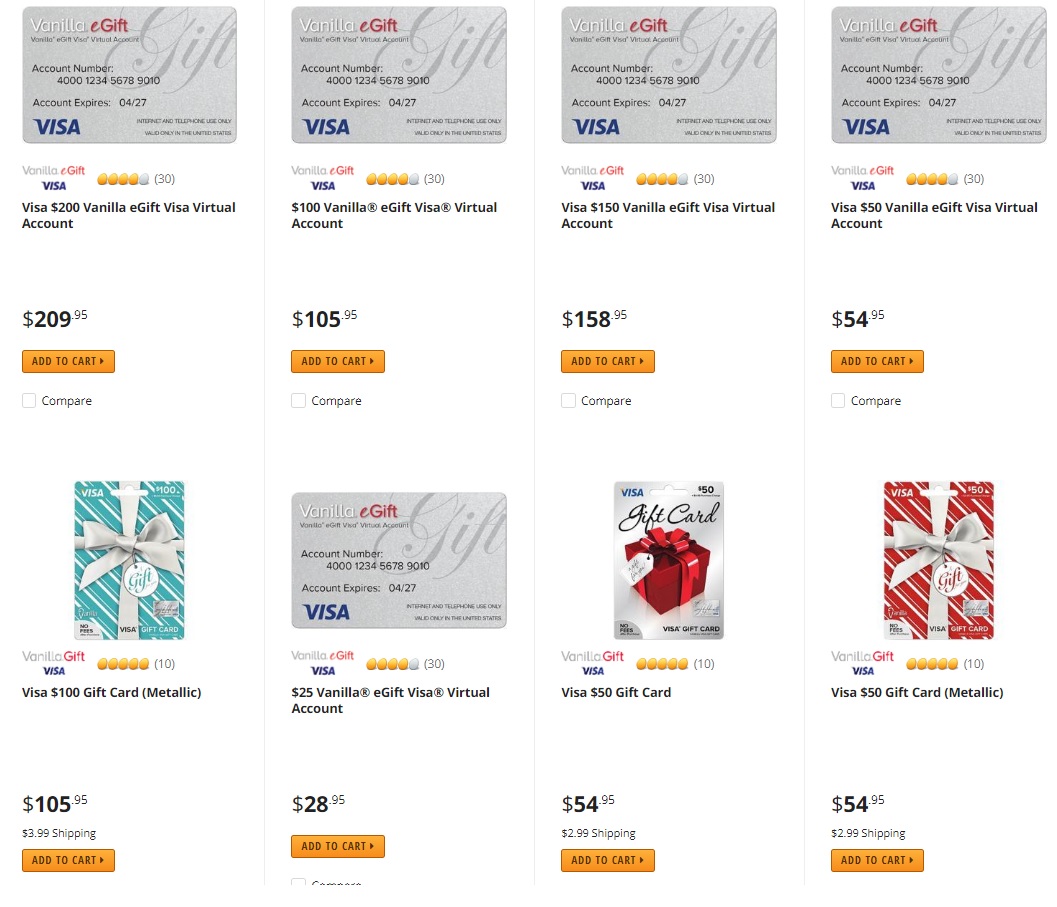
I figured this could be a great way to use a credit card perk and expand my budget a bit: I could buy these Visa Gift Cards for less than face value. Essentially, I could have bought three $100 cards for $222.5 after $95.36 back as a statement credit. That would have dropped my net cost about by about $50 and given me an additional $28 to work with if I could have directly used those Visa Gift Cards to pay for my costs.
If it’s hard to wrap your mind around the math, I’d have spent $222.50 and had $300 in Visa Gift cards. So let’s say I used those Visa Gift Cards to pay for my $272 Air Asia flight. I’d then have the same itinerary as above, only I’d have spent $222.50 on the Air Asia flight since that was my net cost on the Visa Gift Cards. That lops $49.50 off of my above costs:
-
Turkish Award: 7,500 points + $5.60
- DC to Chicago to Honolulu on United
-
Virgin Atlantic Award: 20,000 points + $5.60 with a 30% transfer bonus. Net cost: 16,000 points + $5.60
- Honolulu to Tokyo (NRT) on Delta
-
Air Asia cash ticket:
$272*$222.50 using discounted Visa Gift Cards from Newegg.com via Amex Offer -
- Tokyo NRT -> Bangkok (DMK) (9hr 40min layover) -> Brisbane, Australia (BNE)
- *Note that this was the total price. See below for how I planned (but failed) to reduce the net cost.
- Note also that I intended to enter Bangkok but was unable to do so
-
LifeMiles award: 21,000 miles + $138 with a 25% transfer bonus + 1000 purchased miles. Net cost: 16,000 miles + $153.77
- Brisbane to Christchurch on Air New Zealand (overnight layover of 9hrs)
- Christchurch to Nelson, NZ on Air New Zealand (daytime layover of 8hrs)
- Nelson, NZ to Auckland, NZ on Air New Zealand (overnight layover of 13.5hrs)
- Auckland, NZ to Niue on Air New Zealand
- Booked as one ticket via manual booking process
Total cost = 39,500 points + $387.47.
I’d further have some money left over on those Visa Gift Cards. Since I’d have had $300 in cards and the flight was $272, I’d have had $28 left on the cards. Added together with the $12.53 I still had left from my $400 budget plus the value of the 500 unused points, I’d have enough to at least have some fun (about $51).
Unfortunately, most Visa Gift Cards can not be used abroad, which I think generally includes foreign websites (like AirAsia.com), nor can you generally split tender when buying flights (at least not when buying online). I wouldn’t be able to use multiple Visa Gift Cards to directly pay for my flight. This is where I admittedly intended to flirt with the line: I intended to write about how I bought those Visa Gift Cards, but in order to be able to use them to pay for my flight I had to buy a money order with them and deposit it in my account so I could use my Prestige card to pay for the flight (thereby generating about $12 in points also). I was ready to make the argument as to why this was fair game.
However, I didn’t jump on it immediately. This was a fatal mistake. I figured that I had plenty of time — I could pay for my Air Asia flight now and pay myself back later with the Visa Gift Cards. You can see where I’m slipping down the same slope that many Americans do.
Unfortunately, I dragged my feet and when I finally went to order the Visa Gift Cards, Newegg was no longer stocking them. Ugh. I blew it. All of you who ordered those on Day 1 beat me to it (assuming that Newegg actually fulfilled the orders). My heart sunk as I knew that was going to cost me the chance to stay under budget.
New plan: transporter for hire

Desperate to find a way to get myself within budget after already having overspent, I scrambled for a new plan. I wasn’t willing to abandon the flights above that gave me such a cool trip for less than forty thousand points. I didn’t mind doing a lot of walking to see stuff and relying on eating mostly in lounges and on planes. For those who would criticize that plan as “not really traveling”, keep in mind that the exercise here was demonstrative rather than practical in the sense that we were aiming to show how far you could go without a huge budget. Surely most people will budget more than $400 for vacation and eat a few more meals out — in my mind, the purpose here was to demonstrate what was possible (and to let you think about how much better you would do it).
As I thought about it, I stumbled on a post from Becky Pokora at SightDOING about her experience with AirMule, a company that essentially pays you to transport stuff for them by using your checked baggage allowance. I’ve always thought that the risk on these services far outweiged the reward, but I’ve met Becky once or twice and read her blog for a long time. I have the impression that she’s a rational and intelligent human (and seasoned traveler) who likely took the time to carefully consider those risks and ask the right questions before chancing time in a Chinese prison. More importantly, having read enough of her opinions and rationale on stuff like what to do at destination XYZ and how to choose the right carry-on bag, I feel like I trust her opinion. I’m not saying that you should, just that I personally did and do. So I looked into it.
Unfortunately, AirMule only offers stuff for transport to China and I was not visiting China on this trip — so I didn’t have to think too hard about the risk/reward scale.
However, that got me Googling and I found a site called Grabr that I’d heard of before but hadn’t considered much (as I said above, I’ve never been terribly comfortable with this type of gig — I’ve seen the Transporter movies and have no illusion that I am Jason Statham). Grabr is a bit different than the AirMule model though: with Grabr, you’re basically connecting with someone who wants something. For example, you’re planning to visit Auckland and Suzie in Auckland wants a lego set for her kids that you can get in the US but can’t get in New Zealand, so she is looking for someone to order it on Amazon and bring it to New Zealand and she’ll pay you ten bucks on top of the purchase price for the item in return for bringing it to Auckland. Some rewards are small like that (i.e. ten bucks on top of the purchase price), but I also saw some folks looking for expensive electronics that were willing to throw an extra hundred bucks on top of the purchase price. Grabr is basically a marketplace that connects people who want stuff with people who are traveling from places where you can get it (or perhaps places where you can get it more cheaply).
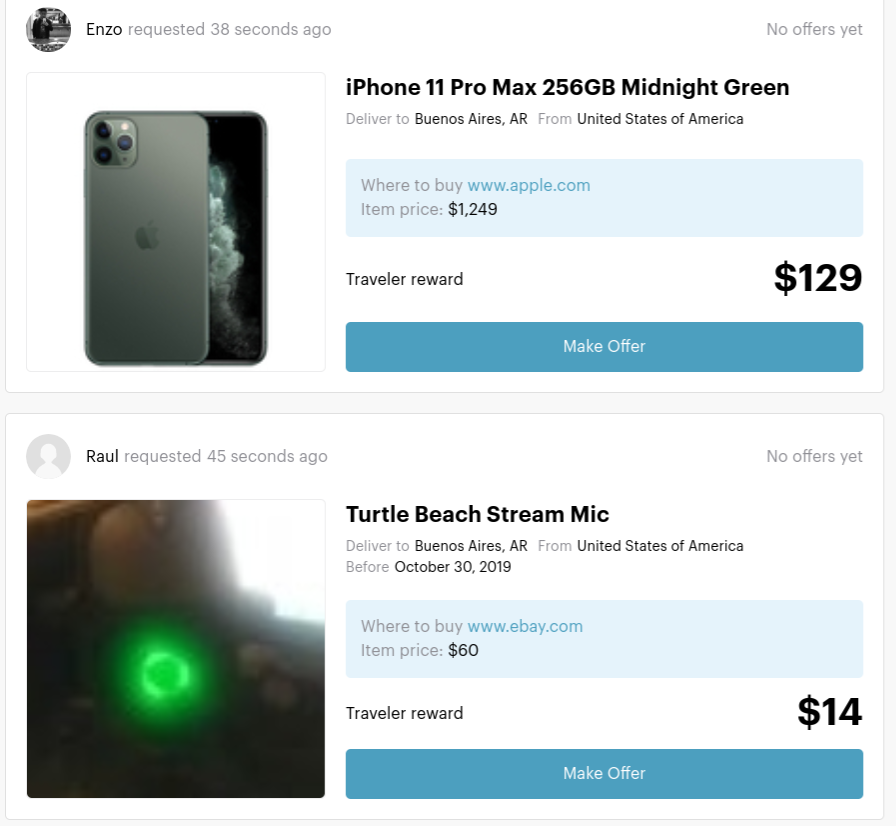
Grabr will tell you that there’s no illegal funny business going on; they’re just connecting you with people willing to pay you to bring stuff to them. The issue here is customs: maybe Enzo shown above in Buenos Aires wants a new iPhone from the US because the taxes are cheaper in the US and therefore the cost is lower, so he offers to give you some money to skirt that. This could be a problem at customs. Grabr’s take is basically that they don’t encourage you to do anything wrong. If you’re not looking to run afoul of the law, you should probably declare the items you’re bringing for someone else (maybe this varies by destination — I’m no import/export lawyer, so take my opinion with a grain of salt here). I assume that perhaps you’ll owe some duty on the items you’re bringing when you declare that you’re bringing them for someone else. You should work that into the price you’re charging the buyer. Of course, you and I probably have no idea what the tax will be on that iPhone, so that makes the game a bit tricky for the transporter. I’d bet that at least some people who do this just don’t declare the items they’re bringing. That’s more risk than I’m generally comfortable undertaking for ten or twenty bucks.
However, I was willing to be a guinea pig: I figured that I’d sign up, agree to bring enough stuff to get under budget, and simply declare it on my customs forms and see what happened. If I ended up paying out way more in duties than I had charged the recipients, my budget would still be blown but I’d at least have some useful experience to share with you. If it worked, I’d be back out of the red.
However, before negotiating a price with buyers, you need to set up a payout method with Grabr. In order to do that, you have to enter some personal info. I didn’t get far at all — the form kept deleting my birth date every time I tried to submit it and go to the next screen to set up my payout method. I tried different browsers / devices multiple times over a couple of days during the week before my trip. I finally emailed support in desperation, but it took them days to get back to me — at which point it was too late for me to buy anything to bring (and their response was just that they had re-set my account and I should try again — no real indication as to whether they understood the problem).
So I struck out again. I figured that I could surely use the trip to make a hundred bucks or so and get myself back into the game. Unfortunately, by the time I set off on Day 1, I knew that hope was lost.
At that point, I made the same mistake that many Americans do: I threw caution to the wind (kind of) and figured that the game was up and I’d just continue to spend (though in fairness I did try to keep my spending down as much as possible as you’ll see below).
So that’s my story: I intended to be under budget on my long-haul flights and have enough cash left to do one or two cool things (which, as you’ll see, I would have) and maybe still go ever-so-slightly over budget while being able to beg your forgiveness. Instead, I went way over. Do with that what you will.
Around Town Travel Spend: $77.57
Here’s how I spent cash for minor travel:
- Honolulu all day bus pass: $5.50 (valid until 3am the next day, this would be my ride from the airport to the Lanikai Pillboxes hike and back to Waikiki and then back to the airport just before 3am)
- Honolulu Uber: $10.43 (when I was riding back to the airport after 2am, I fell asleep on the bus and missed my stop, ending up at the transit center too late to catch another bus before 3am. Stuck late at a transit center in what felt like the middle of nowhere with some folks who seemed strung out and not sure how safe it was for me to spend half an hour waiting for the next bus, I called an Uber. I probably could have waited and spent $2.75 on a one-way trip on the bus (as it was a new day after 3am), I just felt like getting back to the airport safely beat the risk of getting robbed. Already over budget, I was willing to blow an extra eight bucks to get out of there ASAP).
- Tokyo JR train from NRT aiport to get to Naritasan park: $2.22
- Tokyo Narita Express train to get back to NRT airport: $1.84
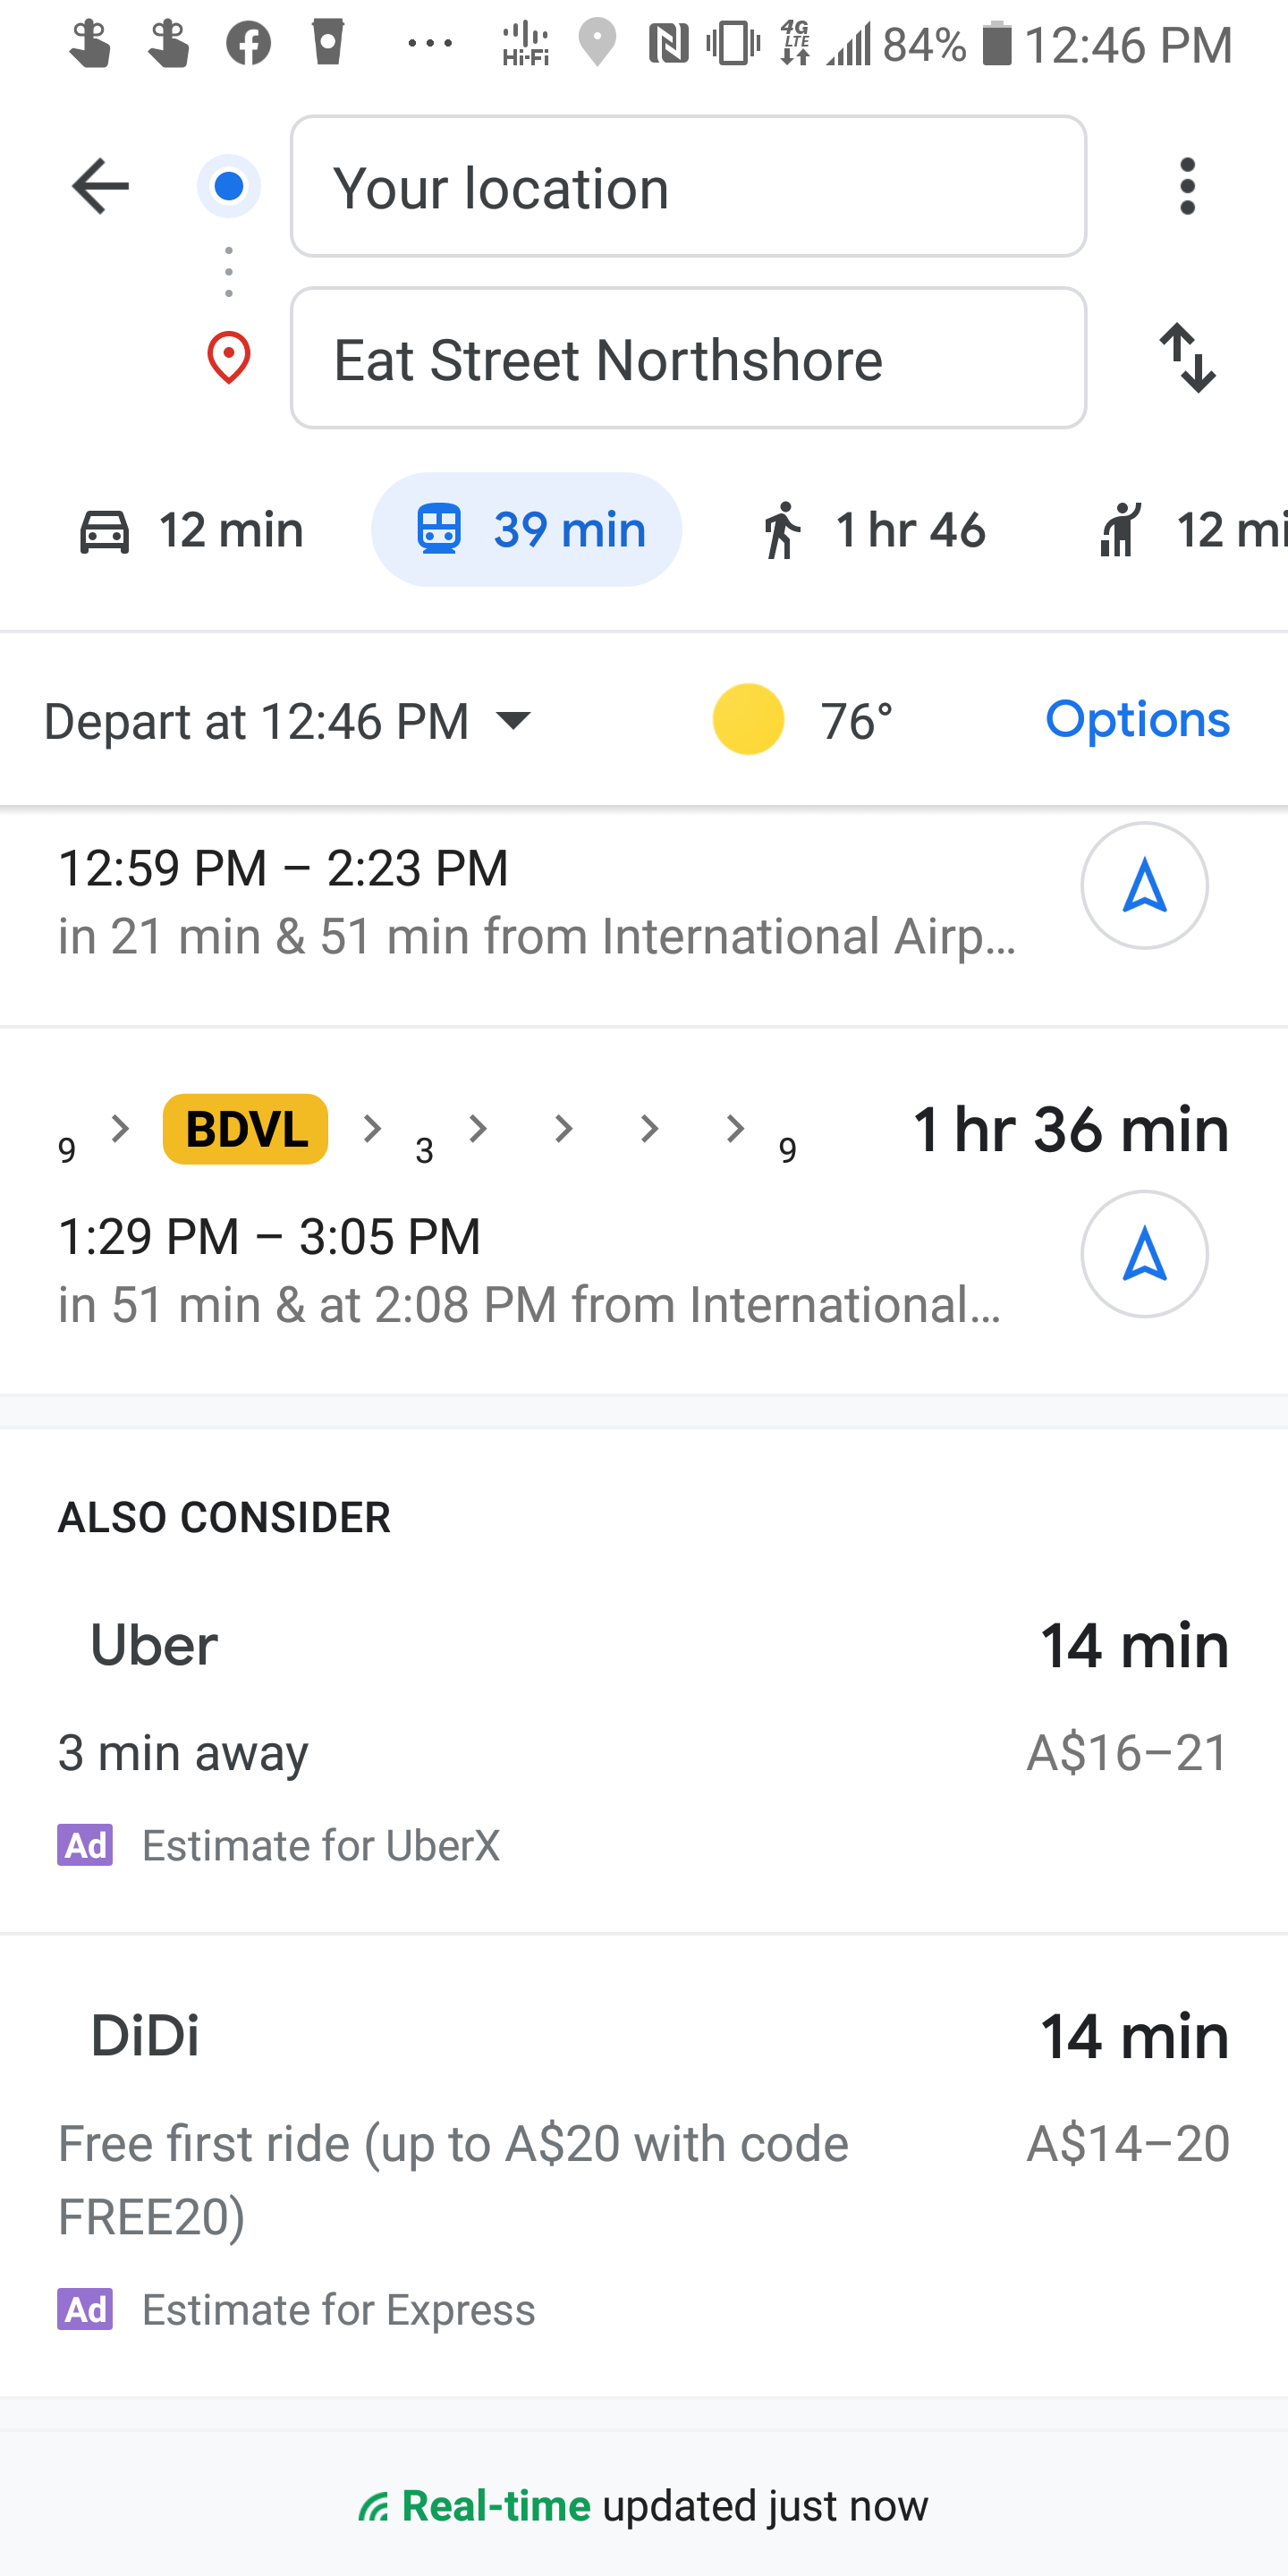
- Brisbane Uber from Airport to Eat Street Northshore: $14.94
- Uber back from Eat Street Northshore: $11.64
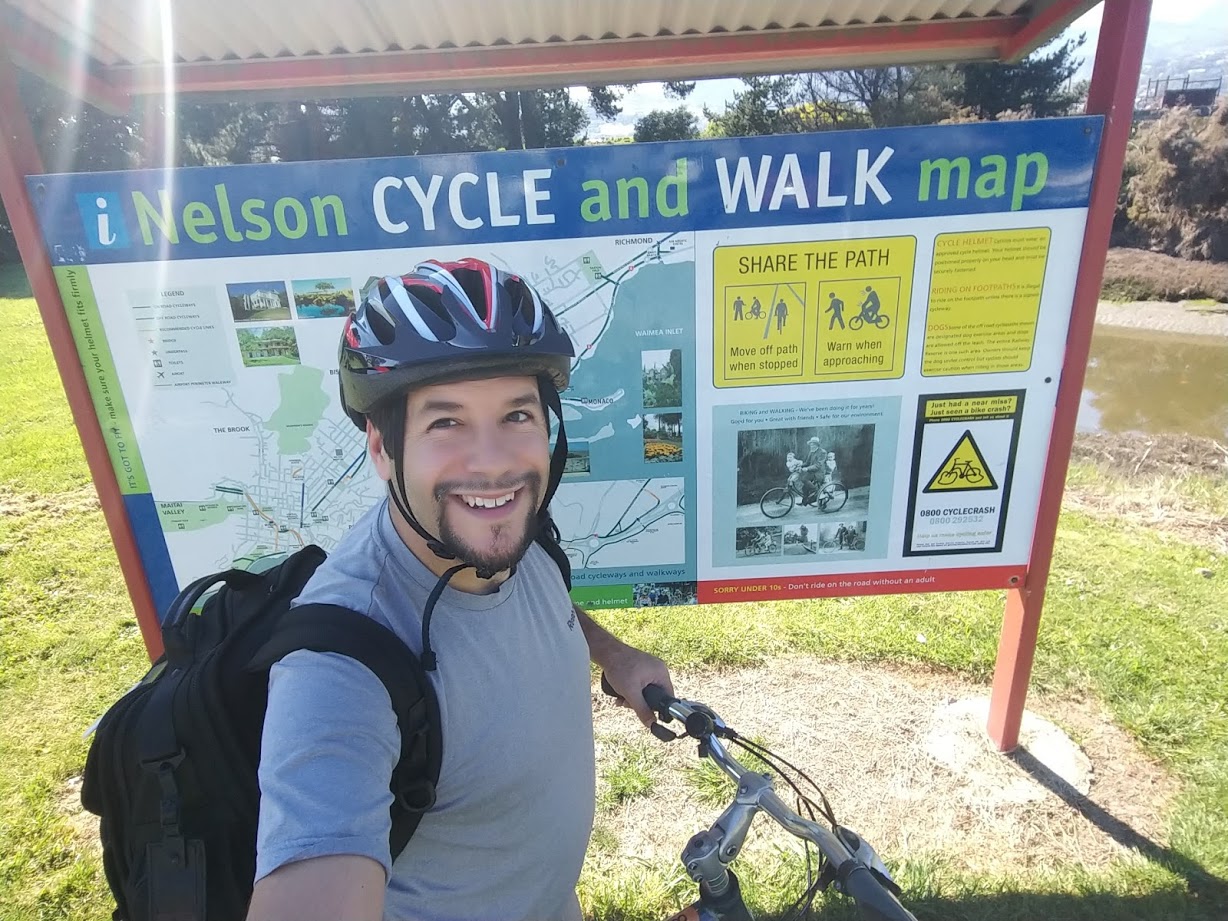
- Nelson, New Zealand bicycle rental: $31
One thing I’ll add here: I didn’t intend to spend $26 on the Ubers in Brisbane. I intended to walk to Eat Street, which is less than 5.5 miles one way from the airport. However, when I arrived and looked up directions, Google gave me the usual price estimate for Uber, but under that was a price estimate for a similar service called DiDi that I’d never used before. Further, Google showed me a promo code to get my first ride free. How awesome is that?
I figured that I’d ride there for free and then walk back. But then I found a different referral code good for your first two rides free. That sounded awesome: I had plenty of time. Thus, I went to the Priority Pass restaurant to fill up on food so I’d be less hungry (and therefore less inclined to spend too much) at Eat Street.
Unfortunately, as I waited for my food to come, I realized that I couldn’t download the DiDi app. Google tells me it is “unavailable in my location”. What? Bummer, dude. It seems that they only want locals using it.
I’d later notice that my Uber driver had a sign advertising DiDi and I mentioned that I tried to sign up but the Play store wouldn’t let me download the app. He told me that I’d need to disable location access, re-start my phone, and then enable location access again and the Play store should then recognize I’m in Australia and let me download it. Unfortunately, that didn’t work. My guess is that it didn’t work because Google Fi still routes my Internet traffic through a US-based server (I guess this because it’s how T-Mobile worked when I was in China last year, thus I was able to access Facebook without a VPN).
In the meantime, I tried reading about some other apps — Olga was one. I tried using a first-time-ride credit on Olga, but it wouldn’t let me add my US-based credit card as a payment method (I tried more than one) — it just said payment failed each time.
Now crunched for time, I called an Uber and figured I’d work out the details later and figure out a way to use some sort of free ride credit to come back to the airport or walk it. Eat Street Northshore was awesome though. I’ll have another little post on my time there, but the short story is that I was having so much fun that I didn’t even think about the fact that I hadn’t checked in for my flight. At about 3:33pm, I wondered to myself what time check in would close for my 5:30pm flight. The answer was 4pm. I tried checking in online, but couldn’t (likely because I needed to confirm that I had an onward ticket out of New Zealand). I knew I was about 12 minutes from the airport by car, so I didn’t have time to mess around: I called another Uber. I walked into the airport 13 minutes before check-in closed and successfully checked in for my flight to Christchurch (I just had to input the date I’d be leaving New Zealand into the kiosk while checking in). A failure to plan my route effectively led to spending more money than I needed to. Google showed the walking route to be 1 hour and 46 minutes. I could have walked that at least one way and maybe I could have found a hack to get the ride back for free if I’d have planned better.
At any rate, I intended for this section to be $37.01 cheaper since I did not intend to use any of the 3 Uber rides included. Had the Visa Gift Card plan worked out, this would have left me with about $10 left plus about $21 in points.
Lodging Spend: 0 points + $51.07
Here’s a breakdown of my lodging spend / lack thereof:
- Oct 2: Free. I slept on the bus and at the airport in Honolulu.
- Oct 3: Free. I spent this night on the plane to Tokyo, arriving on the 4th
- Oct 4: $36.67: Nine Hours Narita Capsule hotel (used an Amex Offer for 20% off a Hotels.com gift card and stacked with a discount code)
- Oct 5: Free. I spent this night on an Air Asia flight to Brisbane (and got an entire row to myself on the plane so I could lay down and sleep!)
- Oct 6: $14.40 Jucy Snooze Capsule Hotel Christchurch (also a discounted Hotels.com gift card stacked with a coupon code)
- Oct 7: Free. I was going to spend the night at the airport, but as my family was in Auckland and staying near the airport, I took my wife up on her offer for a corner of the bed. I walked to the hotel and back. Best alternative would have been a hostel for about $10 plus transit cost from the airport.
After that, on October 8th, I flew to Niue and landed on October 7th. That was my official end point.
I knew that the capsule hotel at Narita airport was out of my budget when I booked it as I planned to be under by just enough to cover the intended local transport options above. However, I felt like the experience might be worth going slightly over-budget for. On the other hand, once I knew the budget was busted, I felt like the capsule hotel wasn’t worth cutting since it wouldn’t bring me back below budget. I know — the justifications here are weak, but that’s how I ran it through my mind.
Food and other spend: 0 points + $38.91
Many meals were included for free with my travel thanks to meals served on planes or in airport lounges. Here’s a full accounting:
- Breakfast at Chef Geoff’s, a Priority Pass restaurant at Dulles airport: $5.01 (just tip)
- Lunch / dinner on Day 1: A mix of protein bars and beef jerky (free as they came from home and thus didn’t count) and leftover fruit from breakfast (which they let me bring from Chef Geoff’s)
- Dessert: Uncle Clay’s House of Pure Aloha in Honolulu for shave ice: $7.28
- Lunch / snack on the way to Tokyo: Free on Delta in economy class
- Dinner in Tokyo / Narita at Ramen Bayashi: $9.54
- Lunch / Dinner in Bangkok: Free. Visited all 3 Priority Pass lounges in DMK’s international terminal
- Lunch in Brisbane: $1.15. Just the overage at Carretto Cafe, a Priority Pass restaurant (where you get $36 AUD per person and it’s counter service. I also ate in the Plaza Premium lounge in the international terminal, another Priority Pass lounge that also has a complimentary a la carte menu)
- Dessert in Brisbane: $7.45. This is a combo of the 3 AUD entrance fee for Eat Street Northshore plus the 8 AUD cost of dark chocolate fondue-dipped brownies and strawberries
- Dinner in Nelson: $8.48. This was the cost of a sandwich at the Nelson airport after my 30-mile bike ride.
Other spend: $53.78
A few other miscellaneous expenses I incurred included
- Australia ETA fee: 20 AUD: $13.47
- New Zealand ETA and IVL fee: 9 NZD (applied via app) and 35 NZD: $27.71 USD
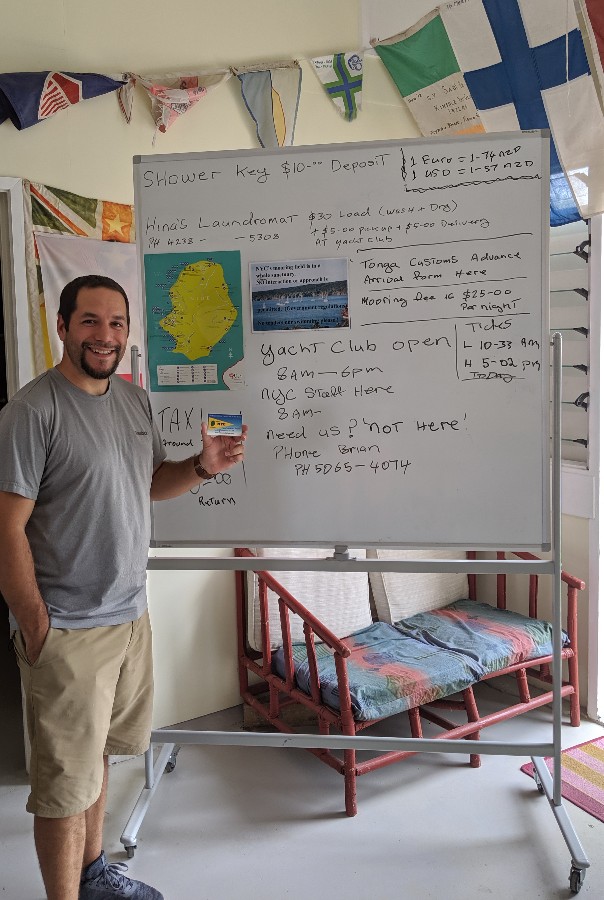
- Niue Yacht Club membership: 20 NZD: $12.60
I had known that Australia had an ETA for US citizens (like an electronic visa), but it was quite cheap — about $13.50. That covers multiple entries within a short period of time (which was important since I would travel through Brisbane on the way home also).
Unfortunately for me, New Zealand also instituted a new requirement for an ETA for travel beginning on October 1, 2019. Had we started the trip a week earlier, I’d not have needed this in my 40K to Far Away accounting. Unfortunately, as I was arriving during the first week of this requirement, it cost me. Here’s a link to the post at God Save the Points that gave me the info I needed to at least save a small margin by applying via the app.
My final expenditure on the trip was joining the Niue Yacht Club, which was $12.60 in US dollars (20 New Zealand Dollars). If you join online, it is more expensive — but in person at the yacht club you’ll save a bit more.
Bottom line
All together, I blew the budget completely, spending $670.90 in addition to my 39,500 points. I could tell you about how my flight expenditures generated 2,181 ThankYou points and so in total I had about $26 in points to cash out against that number, but I think that’s pretty irrelevant given how far over I went. Had things gone closer to my plan and/or had I been able to use Grabr to generate some return on my travel, things could have been better. Even if I had purchased the Visa Gift Cards on Day 1 and I had avoided the Ubers I didn’t intend to take, I’d have ended up over budget — but I’d have likely made a more valiant effort to cut out things like the fondue in Brisbane or the capsule hotel at Narita airport if I had a hope of coming in closer to the $400 mark. As noted above, that’s not a good justification. It’s one that far too many people use when they plan their trips and I’m disappointed to have failed to stay under the budget here. I’m further amazed by how Stephen Pepper is still going within the budget of $400 and 40,000 points a week after I’m done blowing the budget. I thought that I was going to be able to keep this one close and I look forward to a chance to redeem myself on the next one — and hopefully you’ll plan your trip with more precision.
")


[…] challenge, which was to spend 40K miles and $400 to get as far away as possible, I messed up and totally busted the budget. Some, including the man formerly known as The Devil’s Advocate, have hurled harsh words over […]
Showing us how to get to Nieu for 40K and $600 was awesome. The picture with your son on the back, Priceless!
DQed! Would’ve voted for you if you were within budget.
[…] me out on this: Yesterday morning, I revealed the disappointing news that I’d gone way over budget for the 40K to Far Away challenge. How could I possibly still convince you to vote for me? Because I did more for less. No, I won’t […]
[…] Nick: Spent 39,500 points (500 under budget) and $670.90 ($270 over budget). Details here. […]
Come on, man. The rules were the rules, and you didn’t just bend them, you broke them. You shouldn’t have done that. It was a disservice to your readers, and I’ve lost a lot of respect for you.
lol
[…] still traveling for 40k To Far Away, but my journey is due to end in just a few hours. Greg and Nick have already shared how they used their points and cash, so it’s time for me to account for […]
I don’t think it’s playing by the rules that allow staying with family/friends when you fly your family to one of your stops/destinations…
Next version should have some kind of separate budget/rules for hotels. As another reader pointed out, we’re all generally aware of how to save money by sleeping on planes/buses/airports, so no need for you guys to put yourselves through that since we’re not going to learn (that) much.
Idea for next time, give you guys all a “budget” of something like $400 (or whatever number you want) worth of hotel points, based on RRV. You can use any hotel points you want as long as you stay under “budget.” How’s that sound? 🙂
Anyway, while I’m disappointed in this particular result (over budget and staying in your wife’s hotel), I loved all of these posts. The first couple of yours were my favorite. So still, great job to all. Glad you all had (or are still having) very memorable trips.
P.S. And let’s not forget that you still win the award for finding the best new information/sweet spot when you booked your flight to Hawaii with Turkish Airlines.
“AirMule only offers stuff for transport to China” I think that should tell you the legality of what is going on.
And as I mentioned on the other blog, I didn’t think it was necessary to go w/o sleep or not be allowed to crash in a hotel room. I think it has more to do with how to get mileage/fun/interesting experiences with a very limited amount of points and cash will traveling trains/planes/etc.
We all know you can avoid spending anything on hotels if you don’t mind sleeping at the airport, train station, on the street, etc.
As mentioned elsewhere, I’ve enjoyed seeing how far people can go with limited points. If you can handle economy your points can take you very far.
I am disappointed as you are, Nick. The reason is I really was looking forward for you to win since I think I am as cost conscious as you are in many ways. I don’t want to take any credit away from you that you did an amazing job putting the itin together, finding out all the new tricks and hacks through this challenge. Hold your chin high! Love all the posts you put out.
Don’t think I’d so so far as to call it a DQ, but the extent of budget explosion is definitely a big deduction in a close race. Sorry Nick!
But regardless… what a great run, fun documentary, and an impressively cheap trip despite not staying under the $400. Thank you for doing this and enduring those cold nights. This has been extremely entertaining.
At the conclusion of this game I expect FM to challenge all Boarding Area bloggers to do their own #40k.
Nick, thank you for the awesome trip reports, the very detailed accounting and explanations. Unfortunately, I am agreeing with most of the people here and have to call this a DQ. Rules are rules and this is mostly on you and I think you’ve learned for next time that you need to jump on deals earlier.
I am not trying to bash you, but listening to the Frequent Miler on the Air, your trip preparation sounded very last minute. I know you booked the Hawaii flight a while ago, but am curious to how late you booked the rest of your itinerary? And I also don’t know how I feel about your initial idea of using Amex offers as part of this challenge. Chase, Amex and Citi have all at least one premium card that offers Priority Pass and I agree that those are fair game to use. However, I think for the next challenge, you should all consider using only the credit card perks of your “assigned” program, i.e. for you Citi cards and their perks only. That includes that you are only allowed to use Citi cards for any of the “cash related” transactions and use the earned points as statement credit or travel portal etc. I am pretty sure that not all Frequent Miler readers have cards from all three programs and I thought it would be a good opportunity to show all the strength and weaknesses of the three different programs and not mix and match from all the different cards the three of you have.
HChris
I have points from those 3 and did u not see the baby photos ??
But did u join the Yacht Club like I did ..This and all questions in the following days will be answered by the FM staff . Give them a chance to Responded Please !!
CHEERs
Amazing how much you did for what you spent. But I’m going to say that this is a DQ. I’m actually not sure how I feel about Greg’s 811 earned points being used. I guess that’s kind of ok, but I’m going to wait to see what Stephen does. Hopefully, he finishes by 2020.
I think it is very fair game to use the earned points as part of this challenge. Credit card points are (even by the IRS) considered rebates. Whether you use a free ride-share for being a “new customer” or using your earned points as part of this challenge doesn’t make a difference to me, because you still end up not breaking your budget.
What if Greg had spent $100,000 on his Amex Plat last year and then used the 5,000 free MR points he got for that spend to do extra travel during the challenge? Clearly not legitimate, right? I mean, I could stack up free coupons and other stuff for the next ten years and then say that I’m doing a trip that costs me zero. Similarly, if he used his monthly $15 uber credit as part of this challenge, I’d say that’s no legit either, because that’s using a valuable instrument — the $15/month credit — that he could use for something else. It’s on top of the 40/$400. When I spend $100 on my credit card, I spent $100. Just because in the future I get a reward of a different type of instrument (assuming we’re not talking about cash back, which we’re not here) doesn’t mean that I did not spend $100. It’s not legit to say, “I spent $98.50 at Best Buy today because I put $100 on my credit card and I’ll get 100 points in the future which I value at $1.50.” If you tried to pay your credit card company only $98.50 they would eventually hit you with a late charge and interest.
All that said, I’m still on the fence about Greg’s 811 points. It appears from his posting that all of the following are true: (1) he earned them for his spend on the 40k challenge, (2) they posted before he used them, and (3) he used them as points not by trying to use accountants’ tricks to say that the dollars he spent weren’t actually spent.
This is not to diminish in any way what Greg did — what any of these guys did with very limited resources. But I’m still legitimately on the fence about it. It wasn’t the #40.811ktofaraway challenge. Given that Nick blew his budget, the 811 points are relatively less important in a three-way competition but I’m trying to take the competition seriously and I will wait to see Stephen’s numbers before I cast my vote on whether I think the 811 matters!
I am beginning to see your point here. Although, I would counter argue that apart from 40k/$400 another goal was to show the strength and weaknesses of the three different convertible points programs.
I just expressed my opinion about this under Nick’s post here, but I think for next time Greg, Nick and Stephen should only be allowed to use the perks and points of their respective program and can only use those credit cards and their respective benefits. It adds something to it, because Chase has the 1.5x per point travel portal with the CSR, Amex has valuable offers and the Platinum has the Uber credit you mentioned or the WeWorks that Greg already used, Citi has 1.25x through the travel portal with the Premier or 5x on airfare and dining with the Prestige. I think you have to be more definitive of the rules though and discuss whether things like annual travel credits count as well. I think it would shed more light into some lesser known benefits of each program and credit card.
That’s really interesting — I hadn’t even focused on the three different currencies aspect and judging their strengths and weaknesses.
I agree. I also think all 3 should have used the same transferable currency to be fair.
I appreciate that you tried to do the challenge alone and without the help of Couchsurfing, free meals from family and friends, etc. If everything had worked out as planned, I’d definitely be voting for you as your itinerary and use of miles were both fantastic. I’d put you as the frontrunner in the 100k + $1000 challenge.
Thanks for the shout-out and congrats on uncovering some cool value options despite totally blowing your budget.